Resume Manager is a paid plugin for WP Job Manager which provides you with a resume submission form, resume listings, and a candidate dashboard. Resumes created with Resume Manager are used to apply to jobs listed on a WP Job Manager site.
Contents
Installation
To install this plugin, please refer to the guide here: https://wordpress.org/support/article/managing-plugins/#installing-plugins
Create Pages with Shortcodes
After installation, the first thing you’ll need to do is add shortcodes to new pages to create your Resume Manager-specific functionality.
[submit_resume_form]: This is the front-end resume submission form. This allows users to submit resumes to your site. There are no options for this shortcode. Just place it on a page (taking extra care to ensure the shortcode is NOT wrapped in any other tags such as “. You can check this by viewing the page in ‘text’ mode.[candidate_dashboard]: The candidate dashboard allows your logged-in users to manage, edit, delete, and create resumes. There are no optional arguments for this shortcode either.[past_applications]: If you’re also using the Applications plugin, you can allow candidates to view their past applications by adding the [past_applications] shortcode to the Candidate Dashboard page.[resumes]: This shortcode is used to output resumes to a page. It works similarly to the [jobs] shortcode. This page is not public by default: only site administrators and employers can view it.
Shortcode arguments include:
per_page: How many resumes to show per page. Defaults to the per page option in Resume Manager settings.order: ASC(ascending resume order; oldest displayed first) orDESC(descending resume order; newest displayed first). Defaults toDESC.orderby: How to order the display of resumes. Supportspost_titleby default, and any others supported by WP_Query.show_filters: Set to true or false, to show search filters above the resume list (similar to job search filters)show_categories: Whether or not to show categories in the same search filters. This is also controlled in settings (by default).categories: A comma-separated list of category slugs. Only resumes in these categories will be displayed.featured: Defaults tofalse. Set totrueto display featured resumes only.
Example:
[resumes categories="cat-1,cat-2" per_page="20"]will display any resumes from cat-1 and cat-2, 20 per page.
Resumes can be displayed in random order with a few additional arguments:
orderby="rand": Randomizes the display of resumes.orderby="rand_featured": Randomizes the display of resumes, while leaving any features resumes at the top of the list.
Example:
[resumes per_page="10" orderby="rand_featured"]Settings and Configuration
The settings page is found in Resumes > Settings and lets you configure the plugin.

Resume Listings
- Resumes per page – How many resumes to show per page by default when using the
[resumes]shortcode. - Categories – Whether or not resume categories should be enabled.
- Multi-select Categories – Allow multi-selection of categories.
- Category Filter Type – Choose how to filter resumes when Multi-select Categories option is enabled.
- Skills – Whether or not resume tags should be enabled.
- Resume upload – If enabled, users can upload a file (such as a pdf or txt file) which is attached to their resume and can be downloaded by employers.
- Delete uploaded files – Choose whether to deleted uploaded files when a resume is deleted and removed from the trash.
- Personal Data Erasure – If enabled, resumes with a matching email address will be sent to the trash during personal data erasure requests (Tools > Erase Personal Data). They will then be permanently deleted after 30 days.
Resume Submission
- Account required – Whether or not to allow resume submission to users without an account.
- Account creation – Whether or not to enable registration on the resume form.
- Account Username – When enabled, the username will be automatically generated from the first part of the user email upon registration.
- Account Password – If enabled, an email will be sent to the user with their username and a link to set their password. Otherwise, a password field will be shown and their email address won’t be verified.
- Account Role – Choose the default role for the newly registered users.
- Approval required – Whether or not new resumes need to be approved by an admin before being listed.
- Allow Pending Edits – Allow users to continue to edit pending resumes until they are approved by an admin.
- Allow Published Edits – Choose whether published resumes can be edited and if edits require admin approval. When moderation is required, the original resume will be unpublished while edits await admin approval.
- Listing Duration – Limit the number of days listings are live before expiring.
- Auto-hide resumes – To avoid listing outdated resumes, you can enable this option. Set the number of days before a resume gets automatically hidden. After this time, if the resume has not been updated, it will be hidden from view until the user re-publishes it.
- Listing Limit – Limit the number of resumes users are allowed to post.
- Terms and Conditions Checkbox – enabling this requires the applicant to check it before completing their resume submission. The page and it’s contents are not created by WPJM or Applications, and once created, can be set in Job Listings->Settings->Pages.
- ReCAPTCHA – This will help prevent bots from submitting resumes. You must have entered a valid site key and secret key in WP Job Manager’s settings.
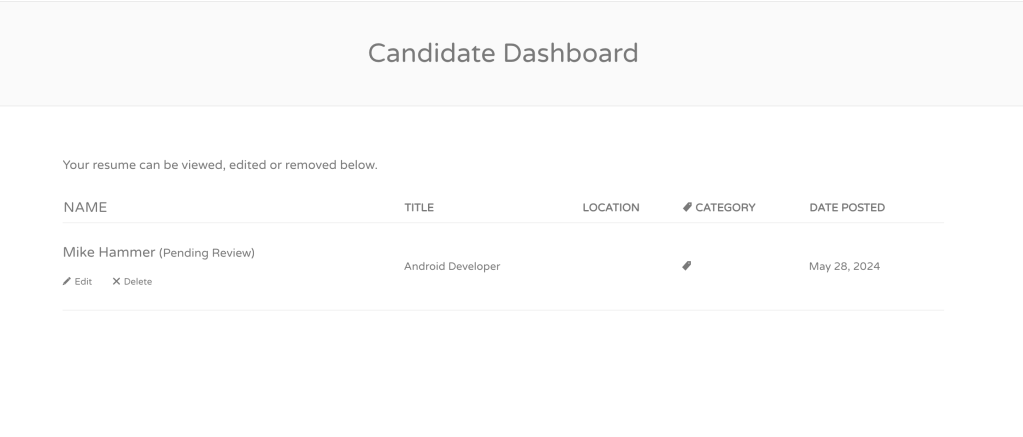
Candidate Dashboard
To create a candidate dashboard, follow these steps:
- Create a new page on your website.
- Add the
[candidate_dashboard]shortcode to that page. - Add the newly created page to your website’s menu.
This page will allow candidates who submit resumes through your system to access and manage them. In some themes, they may need to hover over their resume on this page to see an “Edit” option appear.
Apply With Resume
- Email Based Applications – When enabled, candidates will be able to apply using their online resume only to jobs which use the email application method.
- Website Based Applications – When enabled, candidates will be able to apply using their online resume only to jobs which use the website URL application method.
- Force Resume Creation – Force candidates to create an online resume before applying to a job
- Force Apply With Resume – Forces the candidates to apply using through Resume Manager. The application email address will be hidden forcing the user to submit a resume, signup, or apply with an existing resume.
Pages
Select the pages where you placed the [submit_resume_form][candidate_dashboard], and [resumes].
Resume Visibility
By default, Resumes are visible to employers and administrators only. The options under the ‘resume visibility’ tab let you restrict certain views to certain users by selecting the roles/capabilities that can access that view. Roles and capabilities are explained here.
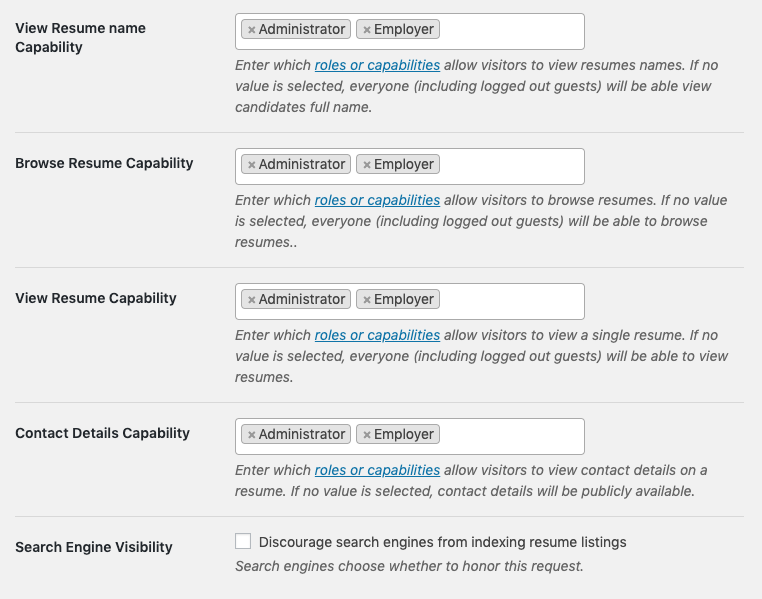
Add/remove roles and/or capabilities for each option as desired. Roles will be prefilled as you type or you can click in each field to select roles. To add a capability, type the capability name and hit Enter. The plugin will then check the user before displaying the relevant Resume information – showing an access denied message if they don’t have the required role/capability.
For example, to only allow employers access to view resumes, add employer in the visibility settings and save. To make resumes publicly viewable, remove all roles/capabilities from the relevant section:

You can also set up custom WordPress capabilities which you assign to the roles you want. To do this:
- Install the User Role Editor plugin. (Caution advised! Editing user roles can have unexpected consequences if you don’t know what you’re doing).
- Go to your admin dashboard > Users > User Role Editor
- Select the role you wish to edit, e.g. Employer
- Click the ‘Add Capability’ button and input the name for your custom capability. This can be anything; in this example lets call it “can_access_resumes”
- Save and repeat for all other roles you wish to give “can_access_resumes” to.
- Go back to Resume Manager Settings > Resume Visibility and input “can_access_resumes” into the settings:
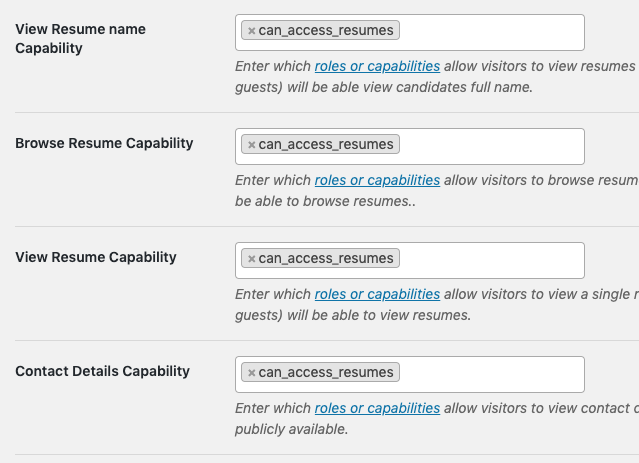
This allows anyone with “can_access_resumes” capability to access your resumes.
Email Notifications
By default, Resume Manager will send an email notification to the site administrator when a new resume is submitted on the frontend, and to the employer when someone applies to a job listing with a Resume (assuming ‘Apply with Resume’ is enabled for email based applications).
You can configure the settings for these emails at Resumes > Settings > Email Notifications
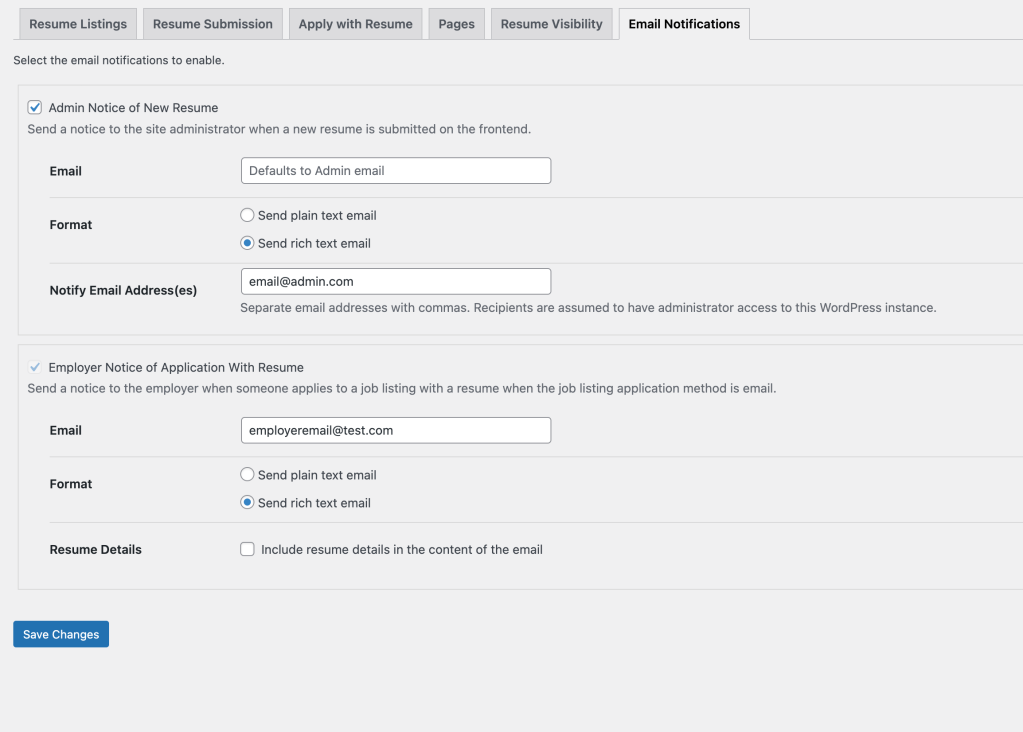
For each email, you can choose whether to send a plain text or rich text email.
For the Admin Notice of New Resume, you can provide a comma-separated list of additional email addresses to send the notice to (it’s assumed that the recipients have administrator access to the site).
For the Employer Notice of Application with Resume, you can choose whether or not to include the resume details in the content of the email. If you don’t, then the employer will have to visit the site to view the resume details.
Note that the Employer Notice of Application with Resume cannot be disabled otherwise the employer will have no way to be notified of the application.
Overriding Email Templates
Resume Manager email notifications are handled by template files. You can override the email templates by copying them to your theme and making edits there, e.g.
Copy the file from the plugin folder:
wp-job-manager-resumes/templates/emails/admin-new-resume.phpto:
yourtheme/wp-job-manager-resumes/emails/admin-new-resume.phpThen make your customizations to the new template file in your theme.
The resume submission process
On the frontend resumes can be created using the resume submission form shortcode (see Shortcodes). Anyone can submit a resume, unless you have enabled the ‘Account Required’ option in Resumes > Settings, in which case only logged in users can submit a resume.
Upon visiting the form, step 1 lets the user input resume details including:
- Their name and contact details
- Their content/summary for the resume
- A category and some skills (enabled via settings)
- Their websites – users can add as many as they want
- Education and experience – again, users can add as many of these items as they want.
Step 2 is a preview where they can see how the resume will look. From then they can click back to edit the resume further, or click submit to go to step 3 where a confirmation is displayed.
Customizing resume submission process (e.g., skipping the Preview step or setting a different page) requires custom development, which is outside the scope of support. Refer to this tutorial for developer-level code example of removing the Resume preview step.
Administrating and creating resumes
Resumes can be approved, edited, viewed or submitted manually from the Resumes top level menu item in WordPress admin. This functionality works a lot like posts and job listings.
Applying to jobs with resumes
You can allow logged in users with resume’s on file to apply to jobs using their online resume. To do this:
- Go to Resumes > Settings and enable the “Allow candidates to apply to jobs with resumes” setting
- Now when logged in users go to apply for a job (which has its application method set to an email address), they will have the option to submit a form with fields for resume + message.
- The employer will receive the message and a ‘view’ link for the resume. This link includes a hash allowing them to bypass any access restrictions on resumes in place so they can view the details online.
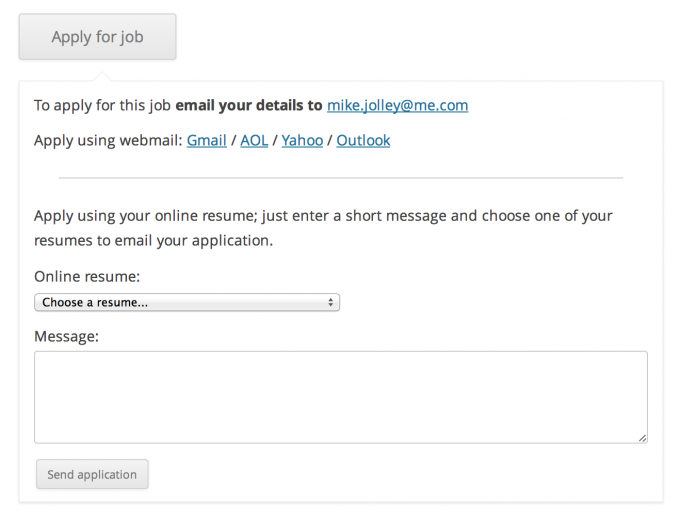
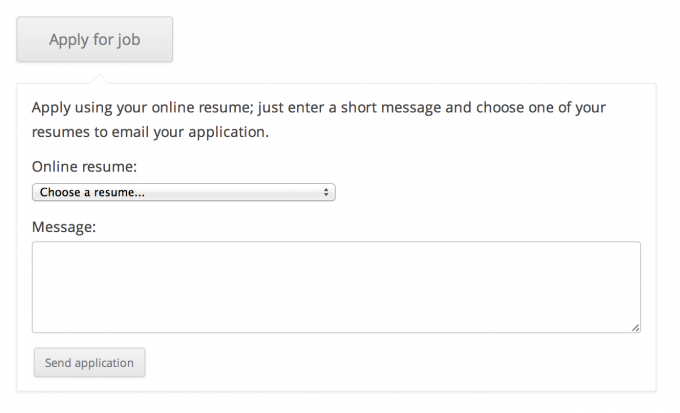
If the Force apply with resume option is enabled too, the email address to apply to will be hidden (forcing the user to use the apply with resume form).
Troubleshooting
If you are experiencing any issue, broken functionality, layout problem, an unexpected error message, or any other discrepancy between what our WP Job Manager plugin and the Resume Manager add-on should do and what’s going on on your site, first try the following basic troubleshooting steps:
- Make sure that you have the latest versions of WP Job Manager and the Resume Manager plugins installed and activated on your WordPress site. The candidate dashboard functionality is provided by the add-on.
- Check for theme/plugin conflicts.
[candidate_dashboard] shortcode issues
If the [candidate_dashboard] shortcode is not working, go through the following checklist:
- Verify that you have added the
[candidate_dashboard]shortcode to a WordPress page. The candidate dashboard will only be accessible if the shortcode is added to a page. - Ensure that you are logged in as a candidate user when accessing the candidate dashboard page. The candidate dashboard is only available to logged-in candidate users.