Note: All code examples and 3rd party plugin suggestions on this site are provided for reference/guidance only and we cannot guarantee that they will always work as expected. Our support policy does not include assistance with modifying or debugging code from any code examples, or providing support for 3rd party plugins
WP All Import Pro allows you to import posts and custom post types (like job listings) using CSV and XML files. This guide will show the basics of importing from a CSV file.
Note: The Pro version of WP All Import is required for importing custom fields, which WPJM uses.
Please refer to WP All Import Pro’s support if you need additional help with this plugin.
Preparing Your CSV File
Columns you may want to include:
- Job Title
- Job Description
- Job Location
- Job Application (email or URL)
- Company Name
- Company Tagline
- Company Website Address
- Company Twitter Handle
- Company Logo URL
- Company Video URL
- Job Type
Importing your CSV File
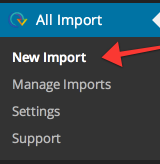
First go to the All Import section and choose ‘New Import’.
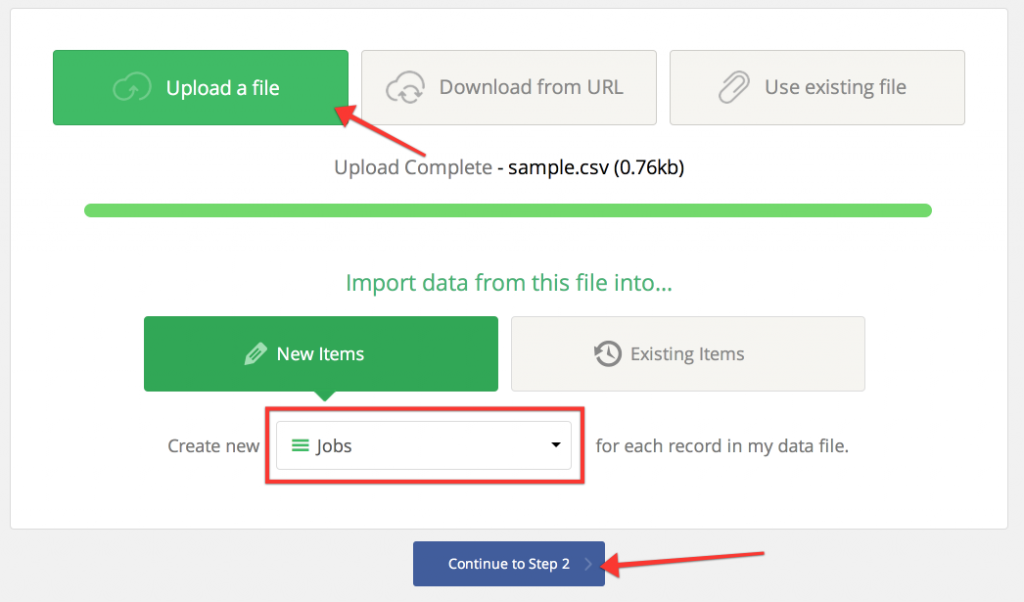
You’ll then be prompted to upload your CSV file. You should also choose to create new ‘Jobs’ for the items dropdown.
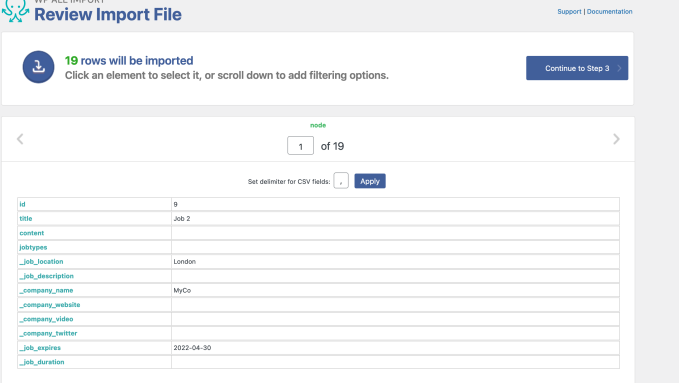
Once the file has uploaded successfully it will show you a preview of your CSV fields. You’ll want to continue to step 3 after ensuring it has uploaded correctly and can be read.
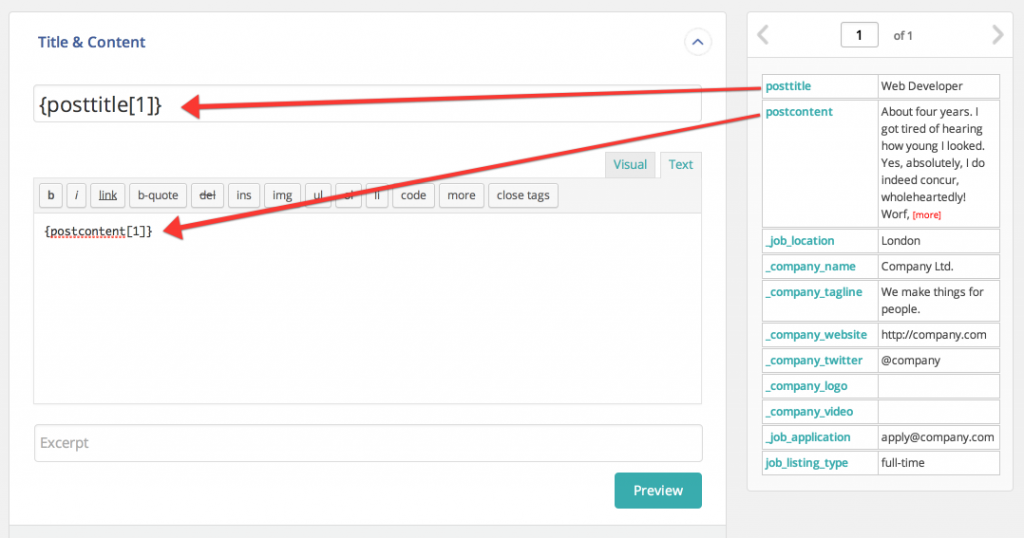
For step 3, you will need to tell WP All Import how to import each of the columns in your CSV file. Start with the post title and content. These need to be mapped to your job title and description:
Next you’ll map custom fields:
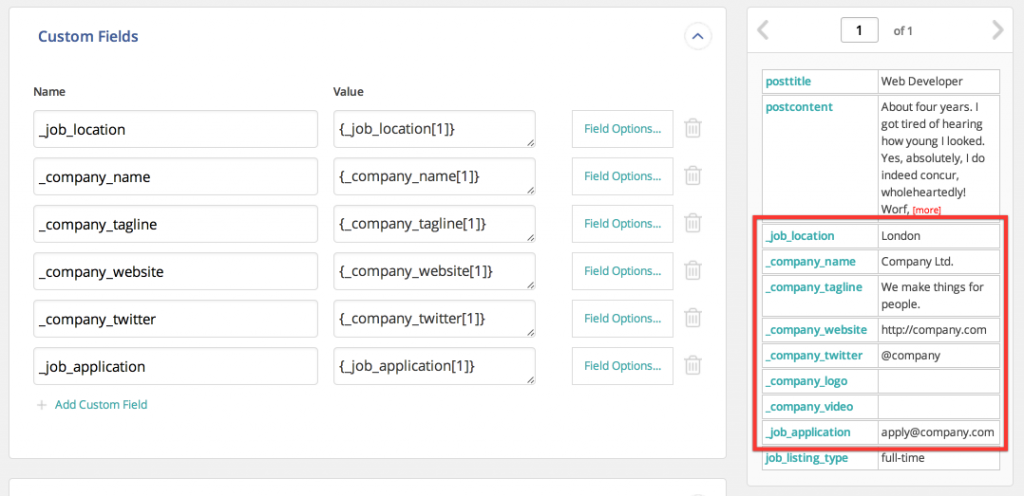
The names of the custom fields you’ll be mapping to include:
- Job Location -> _job_location
- Job Application (email or URL) -> _job_application
- Company Name -> _company_name
- Company Tagline-> _company_tagline
- Company Website Address-> _company_website
- Company Twitter Handle-> _company_twitter
- Company Logo URL-> _company_image
- Company Video URL-> _company_video
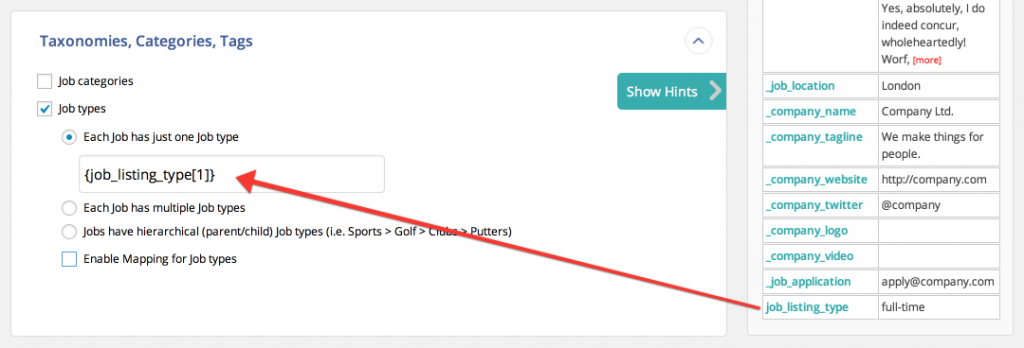
The final thing to map is the job type (and possibly job categories if you’re importing those too). Look in the taxonomies section and map your column containing the terms:
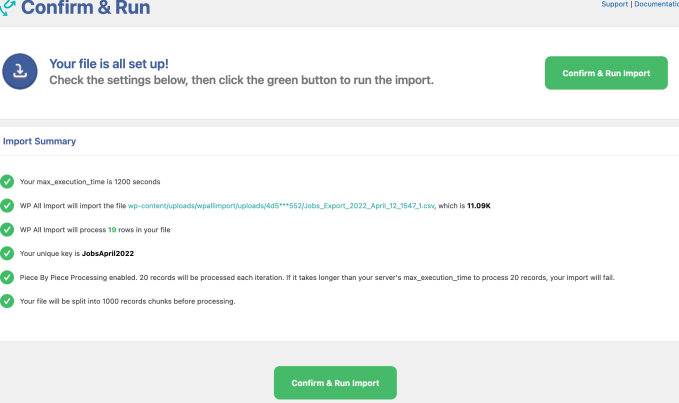
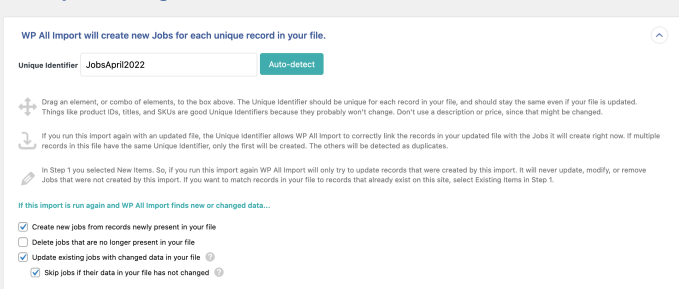
Continue to the next step where you’ll choose a unique ID (you can use the job title here, or a combination of fields), and then you can complete your import. There are other optional settings as well:
Clicking on Continue will take you to Step 4, where your file is finally created, and you can import it: