To download WP Job Manager, navigate to your WordPress admin “Plugins” page, and do the following:
- Click on “Add New”.
- In the search field enter “WP Job Manager”. Click “Search Plugins”.
- Select “WP Job Manager” and click “Install Now”.
- Once installed, click “Activate” to activate the plugin.
You can also download the plugin directly from the WordPress plugins directory. For more information on installing WordPress plugins see the codex: Managing Plugins.
Setup Wizard
Once installed and activated, you’ll see an optional Setup Wizard notification.
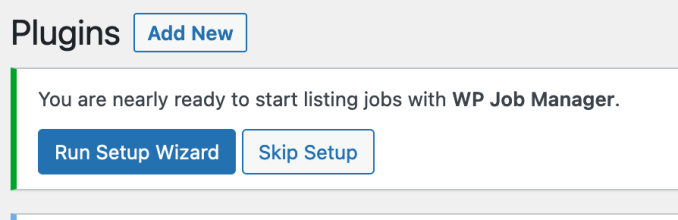
This creates several default pages that WPJM needs in order to work properly. You can skip the wizard, but you’ll be unable to run it again later, unless WPJM is completely deleted and re-installed.
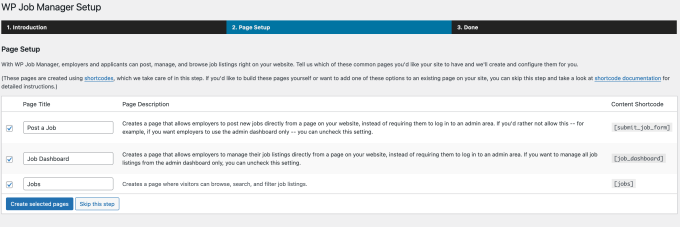
Manually creating pages
If you skip the wizard at any point, no worries! Just make sure to manually create the following pages with the associated shortcode:
| Page Name | Shortcode | Content |
|---|---|---|
| Jobs | [jobs] | shows all jobs listings |
| Job Dashboard | [job_dashboard] | allows employers to administer their job listings. |
| Post a Job | [submit_job_form] | allows employers to submit jobs |
You can read more about the shortcodes here.
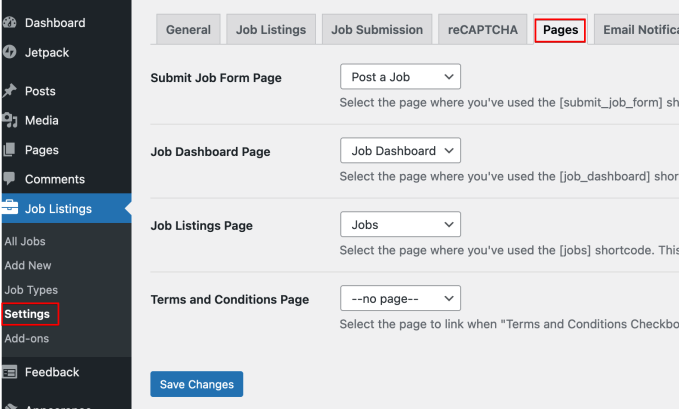
Assign Pages in Settings
Once you’ve created the pages, make sure they are set correctly in WPJM. Go to Job Listings -> Settings, then click on the Pages tab. Ensure that each option is set to the correct page.
Please note that the page name/title can be anything you like (for example, instead of ‘Jobs’, you might title it ‘Listings’). Just make sure the WPJM->Settings options in Pages are set to the correct page; that is, the page which contains the desired shortcode functionality.
A Note on Multisite
While WP Job Manager is multisite compatible, it does NOT sync data between subsites. Each subsite is an independent install.
If you are a developer, you might find this article helpful.
If you are not, you might try this plugin.
CAVEAT: We have not tested either of the above solutions, so they may not work for you. We cannot provide support for these sort of customizations, and they are only provided as possibly helpful hints.