Warning! Adding/editing jobs via the backend, wp-admin dashboard is not recommended. This is because several verification steps are not taken when adding a job this way. WP Job Manager is designed in such a way that all jobs should be submitted via the frontend job submission form.
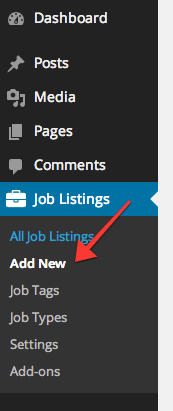
The Add New link, under the Job Listings menu item in admin, will show the Add Job Listing page.
This should look familiar to you if you’ve used WordPress posts and pages before.
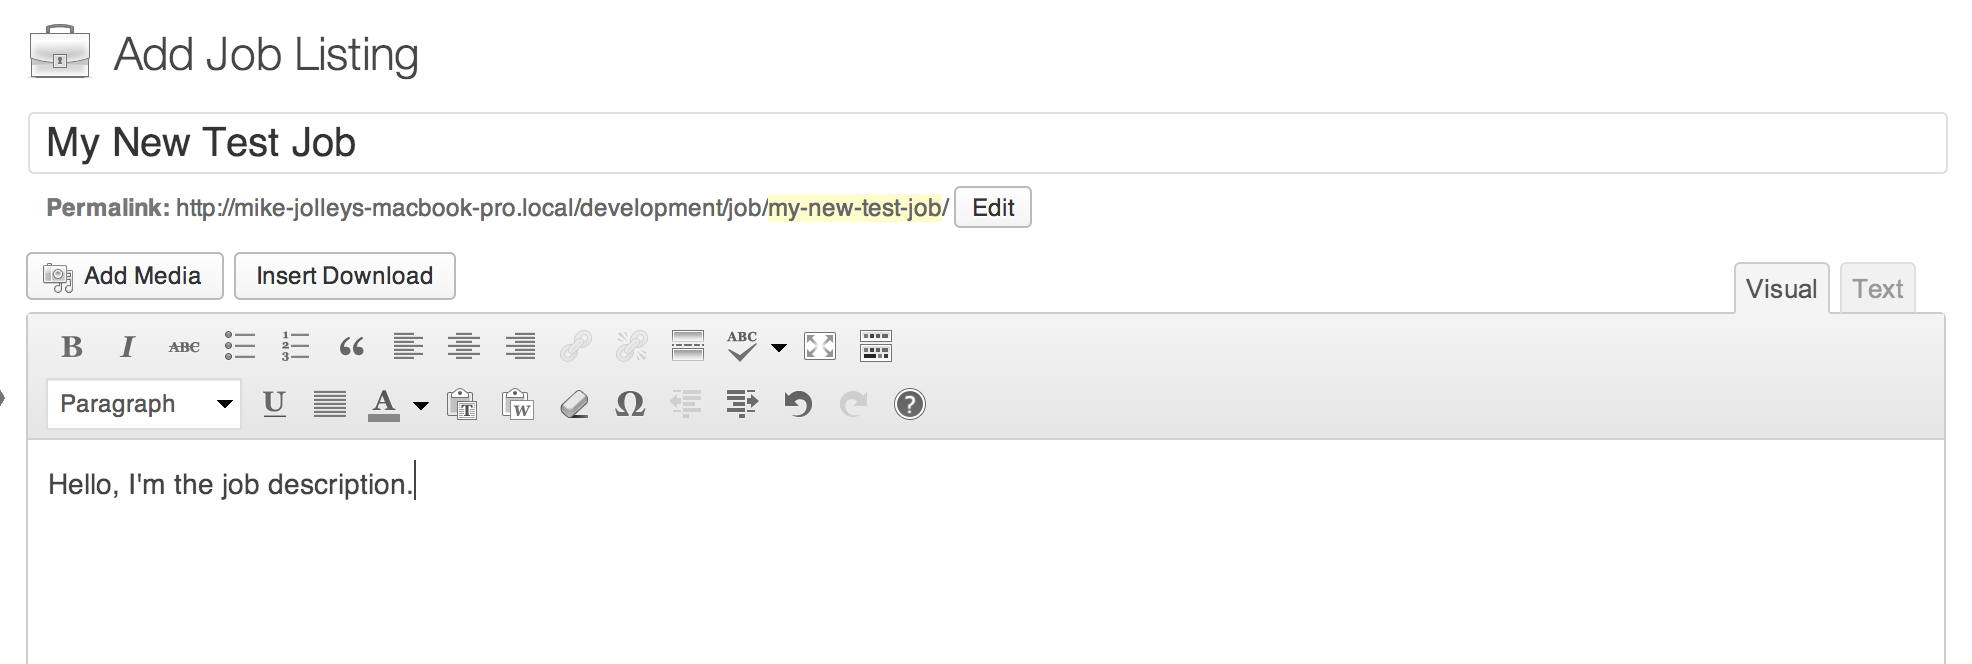
Enter the job title and description
First fill our the “job position title” field at the top with the name of the job you are listing. This is the post title.
Next, beneath that you’ll see a visual editor which you can add the job description in. This is the post content.
Set job meta data
Next, look at the job listing data panel below. This is where you enter job and company details for the listing.
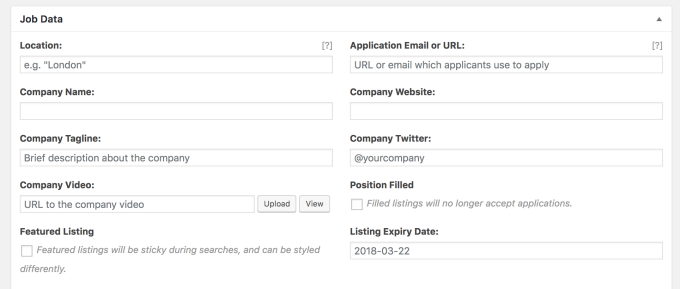
The fields include:
- Job Location – Enter the location of the Job being as detailed as you wish. Leave blank if the job is a telecommuting position.
- Application email/URL – You may enter a URL if the job can be applied for via a website, or enter an email address for applicants to send their application to.
- Company name
- Company website
- Company tagline – Tagline should be a short description of the company.
- Company Twitter – Twitter name, e.g. @company
- Company Logo – Upload a logo, or enter the logo’s URL here.
- Position Filled – check the checkbox if the job is filled/not accepting any more applicants
- Feature this job listing – check this checkbox to feature the job. When listing jobs it will always appear first.
- Job expires – The expiry date for this job in yyyy-mm-dd format.
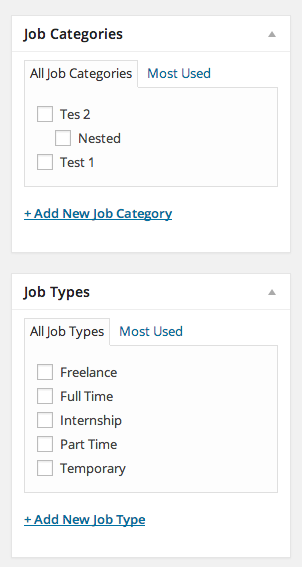
Set category and job type
Finally, in the sidebar you will see two taxonomies; job categories and job types. Select one job type, and as many categories as you wish. This works the same as with posts.
Publish your listing
When you are done, hit publish to make the Job Listing live.
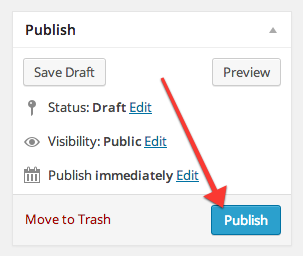
When published, the job listing’s expiry date will be set based on the Listing duration option in settings unless you explicitly set it yourself.
Approve listings under moderation
When the option “Moderate New Listings“ is enabled, you should use the button “Approve” instead of using the button Publish as shown on the section above. The button “Approve” is available directly on the Job Listings page in wp-admin, when you hover over the job listing that is being moderated:
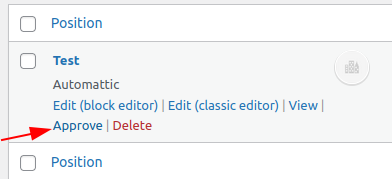
Using this button makes sures that all the post meta data, like thje job listing’s expiry date, is correctly set, fixing issues where the job might not expire correctly.
Bulk actions
The Job Listings screen in wp-admin has a Bulk actions dropdown for acting on several listings at once. Tick the listings you want, choose an action, then click Apply. Four actions are available:
- Approve Job Listings – Publishes listings that are awaiting review, setting their expiry date correctly. Use this rather than the Publish button when Moderate New Listings is enabled.
- Expire Job Listings – Sets the selected listings to the Expired status, retiring them without deleting anything.
- Mark Job Listings Filled – Marks the positions as filled, the same as ticking Position Filled on each listing.
- Mark Job Listings Not Filled – Clears the filled flag again.
All four require permission to manage listings, so they are available to administrators and to any other role granted that capability.
Archiving old listings
The Expired status is WP Job Manager’s built-in archive. There is no separate archive feature, and archiving a listing does not delete it.
To retire a batch of old listings, select them on the Job Listings screen and apply the Expire Job Listings bulk action. From then on:
- Expired listings are never deleted automatically. They stay under Job Listings in WP Admin indefinitely, fully visible and editable, and you can set one back to Published at any time.
- They are kept off the public job board while Hide expired listings is enabled in Job Manager > Settings > Job Listings, which is the default.
- If someone opens an expired listing by its direct URL, they see the listing title and the message “This listing has expired.” in place of the job content, while Hide Expired Listings Content is enabled – also the default.
Automatic deletion of old expired listings is off by default and has to be turned on deliberately with a code snippet. See Deleting old expired jobs.
If you would like a page visitors can browse, you can list expired listings with the post_status attribute on the jobs shortcode:
[jobs post_status="expired"]Note: if old listings never moved to Expired on their own, check the Listing duration setting in Job Manager > Settings > Job Submission. Left blank, listings never expire – a common reason listings from years ago are still live.
Managing Job types and categories
From the admin menu you will also see links to Job Categories and Job Types. These two sections let you add, edit and delete terms.
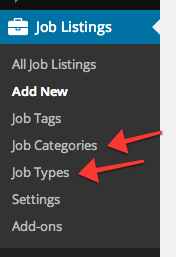
These sections work in exactly the same way as Post categories so see Posts Categories Screen for reference.
Support for cover images
Please note that WP Job Manager doesn’t natively support cover images, so there’s no option to add them either from the frontend or wp-admin.